How to Repair Hairline Cracks in Walls
Hairline cracks in walls are a common issue faced by homeowners. These minor imperfections can lead to larger problems if not addressed promptly. With proper hairline crack repair techniques, you can restore the aesthetics and integrity of your walls. This guide will provide you with step-by-step instructions on how to effectively perform a wall crack repair.
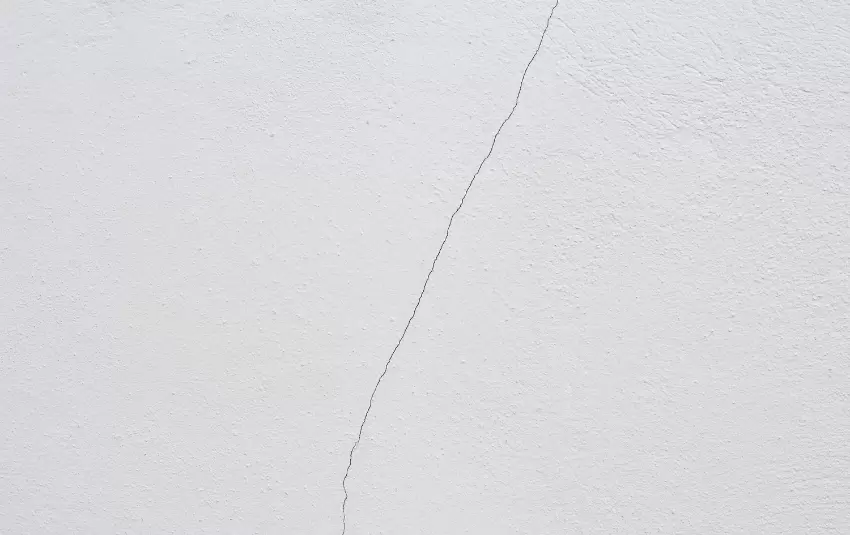
Understanding Hairline Cracks
A hairline crack is a small, narrow split that appears in drywall, plaster, or masonry surfaces. While they may seem minor, understanding their cause is essential before proceeding with a DIY drywall crack fix. Common causes of hairline cracks include:
- Settling of the foundation
- Temperature fluctuations
- Moisture infiltration
- Improper application of plaster or drywall
Essential Tools for Wall Crack Repair
Having the right tools on hand is vital for effective hairline crack repair. Here are the essential items you need:
- Utility knife
- Putty knife
- Joint compound
- Sandpaper (fine-grit)
- Paint or primer
- Masking tape
Step-by-Step Hairline Crack Repair Process
Follow these steps for an effective wall crack repair:
1. Prepare the Area
Start by clearing the area around the crack. Move furniture and cover the floor with a drop cloth to protect it from dust and debris.
2. Clean the Crack
Use a utility knife to gently enlarge the crack and create a clean edge. This helps the joint compound adhere better. Remove any loose material and debris from the crack.
3. Apply Joint Compound
Using a putty knife, apply a thin layer of joint compound directly into the crack. Ensure that it fills the gap completely. For larger cracks or multiple small wall cracks, consider applying masking tape over the crack for enhanced support.
4. Smooth the Surface
Once the joint compound is applied, smooth the surface with the putty knife. Feather the edges to blend the repair with the surrounding wall.
5. Allow to Dry
Let the joint compound dry completely. Drying times may vary based on humidity and temperature but typically take 24 hours.
6. Sand the Surface
After the compound has dried, gently sand the area with fine-grit sandpaper. The goal is to create a smooth finish that blends seamlessly with the wall surface.
7. Clean and Prime
Wipe away any dust created during sanding. Then, apply a primer to the repaired area to ensure the paint adheres properly. Once the primer is dry, you can paint over the repair to match the rest of your wall.
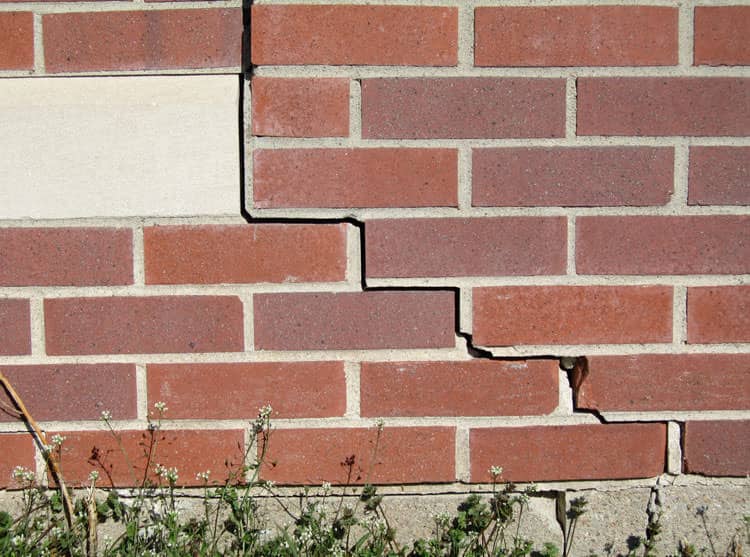
How Do Foundation Cracks Affect Hairline Cracks in Walls During Repair?
When addressing structural issues, understanding foundation cracks and wall cracks differences is crucial. Foundation cracks can lead to shifts that exacerbate hairline cracks in walls. As repairs proceed, it’s essential to evaluate the root cause of foundation damage to ensure that wall stability is restored, preventing future cracks.
Fixing Plaster Cracks
For walls with plaster finishes, fix plaster cracks with similar methods. However, it is advisable to use a specific plaster repair compound. Follow the same steps for cleaning, applying, smoothing, and painting.
Conclusion
Regular maintenance is essential to prevent hairline cracks from developing into larger wall issues. By following the steps outlined in this guide, you can perform an efficient hairline crack repair and keep your walls looking pristine. Whether dealing with drywall crack fixes or plaster imperfections, addressing small wall cracks promptly will ensure the longevity and aesthetics of your walls.
For more maintenance tips or guidance on repairing various surfaces, feel free to explore our blog. Remember, taking a proactive approach can save you time and money in the long run.


Leave a Reply